If you're looking for a delicious yet healthy accompaniment to your snacks, look no further than this Homemade Amla Chutney Recipe. Amla, also known as Indian gooseberry, is a powerhouse of nutrients, and when blended with herbs and spices, it transforms into a zesty chutney that’s perfect for guilt-free snacking.
Whether you're enjoying roasted peanuts, baked chips, or even steamed dhokla, this amla chutney adds a burst of flavor while keeping your health goals on track. It's tangy, slightly spicy, and can be whipped up in just minutes using a few simple ingredients.
Let’s explore how to make this easy and tasty chutney at home.
Why Amla for Snacking?
Amla is widely known in Ayurvedic and modern nutrition for its impressive health benefits:
-
High in Vitamin C – strengthens immunity and supports skin health
-
Antioxidant-rich – fights free radicals and supports detoxification
-
Supports digestion – helps soothe the stomach and enhances metabolism
-
Low in calories – ideal for weight-conscious snacking
Incorporating amla into a chutney is a fun, flavorful, and nourishing way to enjoy this superfruit every day.
Ingredients for Homemade Amla Chutney
Here’s what you need to prepare a refreshing and healthy Homemade Amla Chutney Recipe:
Main Ingredients:
-
5–6 fresh amla (Indian gooseberries)
-
1 green chili (adjust to your spice preference)
-
1-inch piece of ginger
-
A handful of fresh coriander leaves
-
4–5 mint leaves (optional, for a cooling flavor)
Seasoning:
-
½ teaspoon roasted cumin powder
-
¼ teaspoon black salt
-
¼ teaspoon regular salt
-
Juice of half a lemon
-
A splash of water for blending
Step-by-Step Recipe
Step 1: Prepare the Amla
Wash the amla thoroughly. Boil or steam them for about 5–7 minutes until they soften. Once cooled, remove the seeds and roughly chop the pulp.
Tip: Light steaming reduces the tartness and makes the blending process smoother.
Step 2: Combine Ingredients
In a blender or food processor, combine:
-
Chopped amla
-
Green chili
-
Ginger
-
Coriander and mint leaves
-
Roasted cumin powder
-
Both salts
-
Lemon juice
Add a splash of water to help with blending.
Step 3: Blend to Desired Consistency
Grind everything into a smooth paste. If you prefer a chunkier texture, pulse the ingredients a few times instead of making a fine purée.
Taste and adjust salt or lemon juice if needed. You can also add a little jaggery if the chutney feels too tart for your liking.
Step 4: Store and Serve
Transfer the chutney into an airtight container. It can be stored in the refrigerator for up to 4 days. Always use a clean, dry spoon for serving to maintain freshness.
Serving Ideas for Healthy Snacking
This Homemade Amla Chutney Recipe pairs perfectly with many healthy snacks:
-
Roasted chickpeas or fox nuts (makhana)
-
Steamed idli or dhokla
-
Multigrain crackers or baked pita chips
-
Cucumber or carrot sticks
-
Grilled paneer or tofu skewers
It also works great as a spread for wraps, sandwiches, or veggie rolls.
Tips to Make It Even Healthier
-
Skip the green chili for a kid-friendly version
-
Add flax seeds or roasted sesame for extra nutrition
-
Use pink Himalayan salt instead of regular salt
-
Include curry leaves or basil for an herbal twist
The beauty of this chutney lies in its flexibility. You can adjust the ingredients based on what’s in your kitchen or your taste preferences — without losing out on its health benefits.
Conclusion
If you're on the lookout for a nutritious and flavorful dip or side to complement your clean snacking habits, this Homemade Amla Chutney Recipe is a must-try. It's quick, easy, and loaded with the benefits of amla, making it a smart addition to your everyday meals or snack breaks.
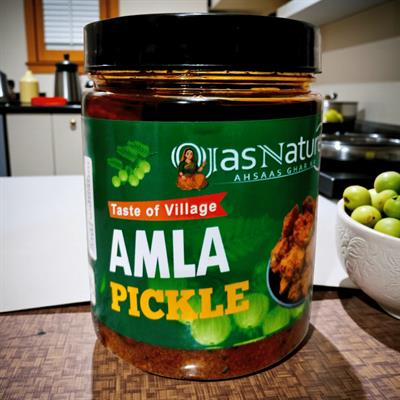
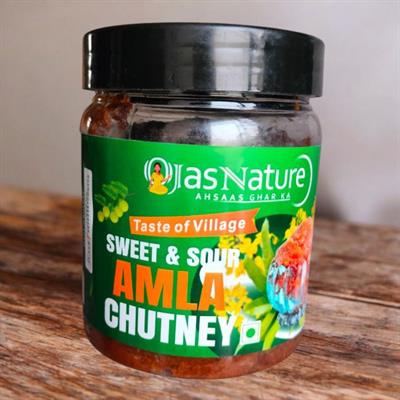
And if you want to experience authentic amla chutneys without the prep time, explore the handcrafted range at ojasnature. We bring you preservative-free, homemade-style chutneys made from real ingredients with real flavor. Visit ojasnature.com and make healthy snacking both tasty and convenient.
Would you like a version of this blog formatted for Instagram or Pinterest as a recipe graphic? I’d be happy to help with that!