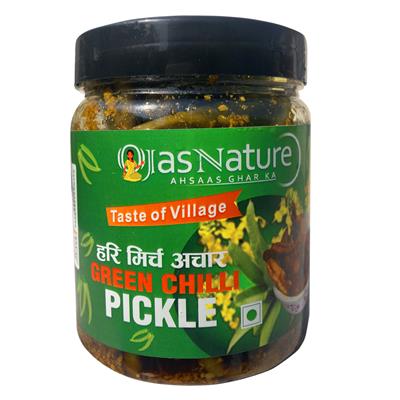
With just a handful of ingredients and simple steps, you can create a jar of spicy & tangy delight that elevates any meal. Whether you serve it alongside steamed rice or pair it with parathas, this homemade green chili pickle will awaken your taste buds.
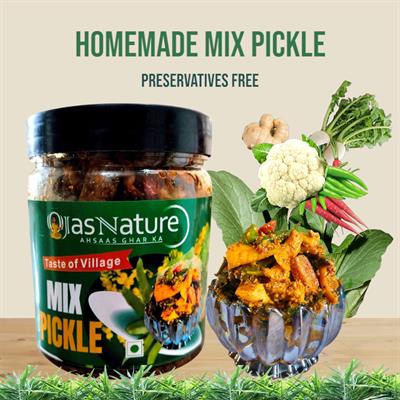
The demand for homemade pickle has surged as people seek preservative‑free, authentic flavors. Making your own pickle ensures you control the ingredients, spice level, and oil quality. Moreover, it’s far more economical than buying the online best pickle brands, and it carries the warmth of your kitchen to the table.
In this blog, we’ll guide you through an easy recipe for green chili pickle. You’ll learn about selecting chilies, preparing the spice mix, and curing the pickle for maximum flavor. We’ll also share storage tips, serving suggestions, and variations to suit your palate. Let’s dive into this tangy journey!
Why Green Chili Pickle Is So Popular
Green chili pickle brings heat and freshness. Unlike red chili pickles, it retains a crisp texture. At the same time, it soaks up the spices and oil deeply. This makes it:
-
Crisp and crunchy: Chilies stay firm after pickling
-
Fresh and zesty: A dash of lemon or vinegar adds brightness
-
Highly versatile: Goes well with snacks, meals, and sandwiches
-
Preservative‑free: You control the ingredients in your homemade achar
Moreover, its straightforward preparation appeals to both beginners and seasoned cooks.
Ingredients You’ll Need
Gather these simple, everyday items before you start:
-
250 g fresh green chilies (slit lengthwise)
-
3 tbsp mustard seeds (yellow or brown)
-
2 tbsp fennel seeds (saunf)
-
1 tbsp fenugreek seeds (methi dana)
-
1 tsp turmeric powder
-
2 tbsp red chili powder (adjust to taste)
-
1 tsp asafoetida (hing)
-
1 tbsp rock salt or coarse salt
-
200 ml mustard oil (cold‑pressed)
-
2 tbsp lemon juice or 1 tbsp white vinegar
These ingredients form the backbone of many homemade achar recipes. They deliver authentic aroma and spice.
Step-by-Step Recipe
Step 1: Prepare the Chilies
-
Rinse chilies thoroughly under running water.
-
Pat them dry with a clean cloth. Moisture causes spoilage.
-
Slit each chili lengthwise, keeping the stem intact. This allows spices to seep in.
Step 2: Roast and Grind the Spices
-
Dry‑roast mustard, fennel, and fenugreek seeds on low heat until fragrant.
-
Let them cool, then coarsely grind in a mortar and pestle.
-
Combine the ground seeds with turmeric, chili powder, hing, and salt in a bowl.
Step 3: Mix Chilies and Spice Blend
-
In a large bowl, add the slit chilies.
-
Sprinkle the spice mixture over them.
-
Use gloved hands to toss everything gently until each chili is coated evenly.
Step 4: Heat the Oil
-
Warm the mustard oil in a pan until it just begins to smoke.
-
Turn off the heat and let the oil cool for a minute.
-
Stir in lemon juice or vinegar.
Step 5: Combine and Jar
-
Pour the warm oil‑lemon mix over the spiced chilies.
-
Stir gently to distribute the oil and spices.
-
Transfer the mixture into a clean, dry glass jar.
-
Seal tightly and leave it in sunlight for 3–4 days, shaking the jar once daily.
After curing, move the jar to a cool, dry place. Your homemade green chili pickle is now ready!
Tips for Perfect Pickle
-
Use fresh chilies: Avoid soft or spotted ones.
-
Keep everything dry: Moisture can lead to mold.
-
Adjust spice levels: Increase or reduce chili powder per taste.
-
Sun‑cure carefully: Too much heat can wilt the chilies; shade works too.
-
Use clean utensils: Always use a dry spoon to dip into the jar.
These practices mirror how top homemade pickle makers ensure quality and shelf life.
Storage and Shelf Life
With proper care, your pickle can last up to six months:
-
Store in a cool, shaded spot after curing.
-
Keep the jar tightly sealed.
-
Use a clean, dry spoon each time.
-
If you see oil separation, simply stir and enjoy.
This tangy delight stays fresh longer when you follow these simple steps.
Serving Suggestions
Green chili pickle adds zest to many dishes:
-
Spoonful alongside dal‑rice or khichdi
-
As a side with parathas and puri
-
Mixed into a sandwich or wrap for extra heat
-
With snacks like samosas, pakoras, or sev puri
-
A flavor boost in noodle or pasta salads
It’s a versatile condiment that complements both homemade achar and everyday meals.
Variations to Try
Want to experiment? Here are a few ideas:
-
Mixed chili pickle: Combine green and red chilies for color contrast.
-
Garlic chili pickle: Add peeled garlic cloves to the mix.
-
Lemon chili pickle: Increase lemon juice for extra tang.
-
South Indian style: Use sesame oil and curry leaves for regional flair.
Each version gives you a fresh take on the classic green chili pickle.
Health and Spice Balance
Green chili pickle offers more than heat. Mustard seeds and fenugreek have digestive benefits. Chilies provide vitamin C and boost metabolism. When consumed in moderation, this homemade achar can aid digestion and enhance appetite.
Balancing spice with the right amount of oil and acid ensures a pickle that’s both tasty and tummy‑friendly.
Why Homemade Beats Store-Bought
Making pickle at home offers clear advantages:
-
Full control over ingredients and oil quality
-
No artificial preservatives or flavors
-
Customize spice levels to your liking
-
Freshness guaranteed
-
Cost‑effective compared to online best pickle brands
Once you taste your own creation, store‑bought jars will pale in comparison.
Final Thoughts
Creating homemade green chili pickle is fulfilling and easy. In under two weeks, you’ll enjoy a fiery, tangy delight that rivals any online homemade achar. With simple ingredients and a few easy steps, you capture the essence of traditional Indian pickling.
So gather your chilies, heat the oil, and embark on this flavorful journey. Your next meal will be incomplete without a spoonful of this spicy & tangy treat!